Field note
Level 5 Drywall Finish, What You Need to Know
What is a level 5 drywall finish? Most people in the construction industry know that there are 6 levels of drywall, ranked from 0 to 5. But do you really understand what that means?
Let’s start by explaining that it is based on the level of finish, i.e., the level of preparedness for paint or other decorative coatings. Then, dive into Level 5 drywall finish: what it is, what it’s used for, and how to apply it.
What are the 6 Levels of Drywall?
The drywall construction, painting, and manufacturing trade associations recognize 6 finish levels of drywall surfaces for walls, ceilings, or other construction.
This ranking system was developed by the Gypsum Association in 1991 to standardize how walls are assembled and sealed during the building process.
These guidelines define in detail the exact level of finish. To fully comprehend how you arrive at a Level 5 finish, it helps to understand the levels before it.
Level 0
Level 0 finish means the drywall has been attached to the foundation or infrastructure, but has no finish.
It is recommended for temporary construction, wall barricades, dust partitions, and other similar structures.
Level 1 Drywall Finish
Level 1 refers to the most basic level of finish. The taping is set into the joint compound but is not embedded.
It is an unfinished state, allowing for the presence of tool marks and ridges. It is typically used in places not visible or accessible to the public, i.e., concealed areas such as above ceilings, service corridors, attics, crawl spaces, or a plenum area.
Level 1 finish is also known as fire tape, where its the minimum amount of taping required to achieve fire ratings on partitions.
When a space is unfinished but still requires fire, or sound, rated partitions, firetaping with a level 1 finish is needed.
Level 2 Drywall Finish
Level 2 is also an unfinished state where the wall has yet to be painted, but the taping is more detailed and extensive.
Tape is embedded in the compound. Tool marks and ridges are allowed. Corner beads and drywall screw heads are covered, and excess mud is wiped away.
This level is used in garages, warehouses, and other storage areas.
Level 3 Drywall Finish
Level 3 is ranked by how much treatment has been applied. At this stage, the taping must be embedded in compound with an additional coat to cover the taped joints and angles.
It requires fastener heads and beads to receive two coats, whereas a Level 2 finish, only one is required.
The finish must be smooth, and free from tool marks or ridges. This level is used with a medium to heavy final paint texture, but not for smooth painted surfaces or smooth wall design. A level 3 finish is also commonly used at heavy-grade wall coverings.
Level 4 Drywall Finish
Level 4, like Level 3, is ranked based on how much treatment has been applied.
Here, there are two coats of mud or drywall compound applied to the embedded tape at joints and angles, while the fastener heads and beads are covered with three coats.
The compound has to be smoother so that no tool marks or ridges are visible. This level is recommended for lightly-textured painted surfaces or lightweight wall coverings. Enamel paints, semi-gloss, and high gloss paints are not used.
At this point, the drywall is ready for Level 5 drywall smooth walls.
What is a Level 5 Drywall Finish?
Level 5 is the most complicated level of finish.
It includes all the steps of Level 4, but with an additional thin skim coat of joint compound applied evenly across the entire wall, ceiling, or surface of the gypsum board to create a smooth finish and a perfectly smooth surface.
You don’t often hear references to Levels 0, 4 in the field, whereas Level 5 is often used as a buzzword for the highest quality smooth wall finish.
In short, it refers to drywall that has been taped, first- and second-coated, then sanded lightly to remove tool marks before a thin skim coat of joint compound is applied to the entire surface. The skim coat is lightly sanded as well.
Level 5 Drywall Finish
The end result is drywall with a smooth, uniform surface that looks great under any conditions, such as severe lighting conditions, shadows, or high gloss paint.
There is also no chance of fasteners and screw heads showing through the paint. The finished level 5 surface will be ready for wall coverings or final decoration.
Another way of looking at a Level 5 drywall finish is a skim coat of joint compound (also known as “mud”) applied to a finish that would otherwise be at Level 4.
When is Level 5 Drywall Used?
A Level 5 finish is the gold standard. However, different areas and rooms require different levels of finishing.
Any wall that is hidden from view, such as behind a kitchen cabinet in a residence, or in a storage area in a commercial building, does not require Level 5.
A Level 5 Drywall Finish is Typically Used in Two Settings:
1. The final coat is glossy, or non flat paints are used.
2. Walls, ceilings, and surfaces with critical lighting or similar areas. Light coming from fixtures or large windows is angled low enough to show irregularities, such as bumps and depressions, and must be skim coated.
The ceiling is a good example of an area where a Level 5 finish may be required. This is because ceilings can be raked by natural light streaming in through the windows, highlighting flaws in the finish.
READ more about construction wall types,
How is Level 5 Drywall Applied to Walls?
Because hanging drywall is an interim step in finishing a wall, mistakes can be covered up.
It’s the final step, the taping and finishing, that causes headaches because that’s the stage that everyone will see. You have to get it right.
Whether you are a commercial drywall contractor, residential contractor, small business owner, or do-it-yourselfer, it always helps to have a few extra tips about getting the smoothest possible Level 5 drywall finish with skim coating.
The skim coat can be applied with a thick-nap roller, taping knife, or spray finish. When using a taping knife, 6 or 8 dabs 3” to 4” in diameter are applied to the surface, and then the excess compound is scraped off.
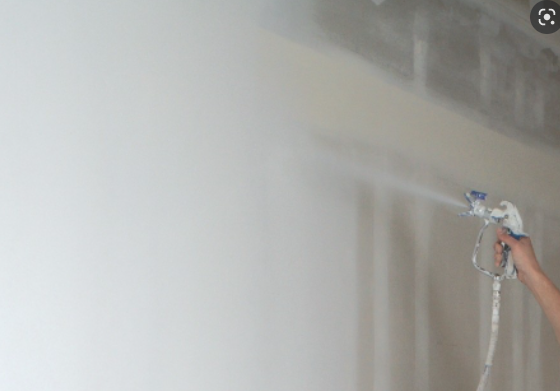
Professionals often use special spray equipment that can also be purchased through drywall supply yards or rented at home improvement stores.
Here is our recommendation for using a roller, which is an effective method for do-it-yourselfers.
Initial Sanding
First, sand the wall’s surface with a pole sander.
This assumes you have completed previous levels to the standard of a level 4 finish on the wall. All joints and interior angles should include tape with joint compound and a consistent, thin drywall mud coating.
Dust Removal
Using a brush, remove all the dust and chunks of compound from the surface.
Create the Compound
Mix the compound with water until you get a consistency that is not too thin. To test the consistency of the mixture, dip a roller with a thick nap into the solution.
It should cling to your roller, not drip off it. You can also purchase pre-mixed drywall primer, which is ready to spray or roll onto surfaces straight from the bucket, often referred to as high build primers.
Apply the Compound
Roll the compound over the entire surface of the wall. You should move your roller up the wall rather than down it to prevent drips, using a single long pass, going over the seams to blend them in.
The compound should be applied in a heavy coat, if it’s too thin, it will dry too quickly, preventing you from removing it.
Remove the Compound
After rolling an area with a width of 4 feet, remove the compound right away with a finishing knife. Apply compound that is still wet to any area that has dried to make it easier to remove.
Remember, a Level 5 finish is a thin film, not a veneer plaster finish. Your goal is to even out the entire surface, not add a thick layer onto the wall.
Final Sanding
After the wall has completely dried, which should take approximately one hour, go over it with your pole sander using 220-grit sandpaper until you have a uniform surface.
Now that you have a grasp on Level 5 drywall finishing, go out and take your work to the next level!
READ more about other popular drywall products –
Fast Drying Joint Compound, Choosing The Right Drywall Mud
What You Need To Know About Ballistic Drywall
Sheetrock Vs Drywall: The Guide To Gypsum Panels
Green Board: The Basics Of Water-Resistant Drywall
Basics Of Sheetrock Screws And Drywall Screws
DensShield Tile Backer For Your Next Project
Structural Steel Studs And Wood Studs