Skip the stress—screw pops are the drywall world’s version of a bad haircut: annoying, obvious, but totally fixable in one focused session with the right tools and a bit of mud. Below you’ll learn why pops happen, the fastest pro-approved repair method, and how to leave a feather-smooth finish that disappears after paint.
Why Do Screw Pops Show Up?
- Lumber movement: framing dries, shrinks, and pushes screws forward.
- Over-driven fasteners: screws sunk too deep lose grip on the paper face.
- Temperature swings or vibration: think attic truss uplift or slamming doors.
- Missed studs: screws biting air instead of solid wood.
Tools & Materials You’ll Need
- 6-in-1 drywall screwdriver bit or a driver with an adjustable depth stop
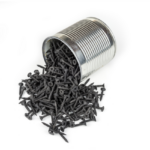
- 1¼ in. coarse-thread drywall screws
- 6-in. & 10-in. taping knives
- All-purpose or lightweight joint compound
- Dust-control sanding sponge (120-150 grit)
- Shop vacuum or sanding pole with dust extractor
- Utility knife, pencil, and safety glasses
- Optional but faster: dust-free corner sander & quick-dry setting compound (20-minute)
Step-by-Step Repair: Walls
1. Re-secure the Panel
Drive a new drywall screw 1–2 in. above and below the pop into the stud. The new screws pull the panel tight and prevent future bulges. Sink the head just beneath the paper—no tear-throughs.
2. Cut & Dimple the Old Pop
Use a utility knife to slice away loose compound, then dimple the offending screw until it’s slightly recessed. Vacuum the crater so mud bonds to clean paper.
3. First Coat of Mud
Load a 6-in. knife with setting-type mud and press firmly over the pop and the two new screws. Feather edges ≈ 2 in. past the repair. Let the fast-dry mix kick (≈ 20 min.)
4. Second (Finish) Coat
Switch to a 10-in. knife and lightweight topping mud. Skim a thin coat 8–10 in. wide, tapering edges to blend with the wall. Dry overnight.
5. Sand & Touch Up
Lightly circle-sand with a fine-grit sponge until glass-smooth. Shine a shop light across the surface—no ridges allowed. Prime the spot before color coat.
Step-by-Step Repair: Ceilings (Same Concept, Gravity Edition)
Follow the wall steps, but drive two new screws on each side of the pop to combat sag. When mudding overhead, mix compound a hair thicker and use a hawk + 6-in. knife for better control.
Speed Hacks for Mudding & Sanding
- Warm water = faster set. Mix hot tap water into setting compound to shave minutes.
- Add a dash of dish soap. Breaks surface tension and helps mud glide like butter.
- Spin-sander + vac. A dust-extracting pole sander keeps the room (and your lungs) clean.
- Prime with stain-blocking primer. Stops flash spots that telegraph through flat paint.
When to Call a Drywall Pro
If you count more than a dozen pops in one 4×8 ft. sheet, the framing may be shifting or the entire board is floating off studs. Get a pro to check structural issues before you waste mud.