What’s the best sandpaper for drywall? Do you have a drywall project coming up, but need to learn about the many varieties of sandpaper first?
And what are my options for drywall sanding tools? Not only can I tell you all about sandpaper, but I can also show you the easiest, fastest, cleanest, and nearly dust-free method to sand drywall.
Sand Paper for Drywall
Take a look around the room right now. You’d be hard-pressed to find many interiors, commercial or residential, that are untouched by drywall. Gypsum board is a cost-effective and convenient way to finish interior walls and ceilings. It’s everywhere!
We all know hanging and taping drywall is a serious job. For those of us who’ve done it, we understand what it takes to get the job done right. Lots of sweat, sore muscles, and attention to detail.
But drywall sanding is one step in a drywall process that doesn’t get enough attention. Sanding drywall is just as important as any other step in the drywall process.
Proper Sandpaper, and the Best Drywall Sanding Tools
You can’t have perfectly smooth walls that are ready for paint without proper sanding technique.
And a proper sanding technique requires the correct sandpaper for the job, and the best tools and equipment available. With these things in mind, your drywall project can be successful.
Let’s take a look at proper sandpaper for drywall, then dive into the best tools for drywall sanding.

What is the Best Sandpaper Grit for Drywall?
In order to understand which grit sandpaper is ideal for drywall, it’s important to know the basics of how sandpaper grit works. Sandpaper grit runs from as low as 40-grit up to 400-grit.
As the numbers go higher, the grit of the sandpaper gets finer, meaning 80 heavy-grit paper is significantly coarser than a 200 medium-grit sandpaper.
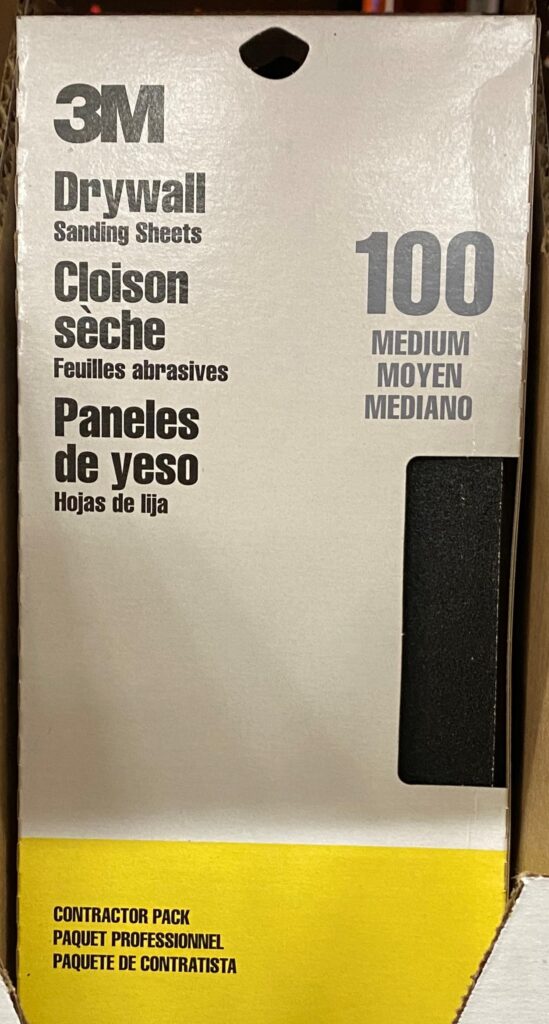
For drywalling, you should aim for medium-fine sandpaper, somewhere in the 100-150 grit range. But this depends on the type of drywall joint compound you’ve applied, so it’s best to review the drywall mud manufactures recommendations before deciding on a sandpaper grit on your own.
Fine-Grit, Medium-Grit, Heavy-Grit Sandpaper
Fine sandpaper at or above 220-grit simply can’t sand drywall effectively. The abrasions that 220-grit and above make on gypsum board would be so fine that you couldn’t notice them.
Coarse-grit paper like 80-grit isn’t necessary because drywall joint compound nowadays is soft enough to be sanded down at up to 180-grit.
Using coarse sandpaper less than 100-grit may leave visible scratches in the drywall mud compared to a fine-grit sandpaper. Even worse, a coarse grit sandpaper might tear the drywall paper under the drywall mud.
If you’re using an orbital sander, opt for a finer 150-grit paper for better results.
What Tools Should I Use to Sand Drywall?
Now for the fun part, the best drywall sanding tools. This can make or break your drywall project. It’s where all your hard work of drywall hanging and taping can go down the drain.
If you don’t have the best tools for drywall sanding, you’re wasting time, money, and you could potentially damage the drywall and joint compound.
Choosing the right drywall sanding tools depends on the size of the job. For simple patches, a sanding block might be all you need.
Best Electric Drywall Sanders
But for typical drywall sanding jobs, you’ll want an electric drywall sander. I’ve tested several electric drywall sanders in my day, and I have the perfect model to recommend.
BraveX 6.5-Amp Electric Drywall Sander
Back in the day, you might have used a pole sander. Nowadays, if you’re still reaching for that pole sander thinking you are saving a couple bucks in tools, you couldn’t be more wrong. Truly great drywall sanding tools are getting lighter, more powerful, tougher, and more affordable than ever.
I’ve sanded more drywall than I care to admit, but I do know this – you are losing money by not having an electric drywall sander.
Less Dust, More Efficient, and No More Back-Breaking Labor
The BraveX 6.5-Amp electric drywall sander will save time, keep dust down to a minimum, and get your drywall job done right, without breaking your back and arms in the process.
Here are just a few main features of the BraveX Electric Drywall Sander –
- 7 Variable Speeds from 500 to 1800 RPM
- 780W pure-copper motor
- 360 degrees rotating sanding disk
- 90 degree flexible sanding head
- Automatic dust removal with vacuum, 7′ hose, and dust bag
- Detachable extension rod extends to 6.2 feet
- Simple storage, lightweight design
- 26′ power cord
Precision Drywall Sanding
The high-power, pure-copper motor features 7 speeds to adjust to your exact needs. One of my favorite features of the BraveX electric drywall sander is the high-powered suction system to reduce nearly 99% of all drywall dust. If you’ve ever sanded a drywall ceiling, you understand how important this feature truly is.
Flexible and Comfortable Drywall Sanding
The 360 degree rotating sanding disk reaches corners without the discomfort of twisting and torquing your body. The BraveX sanding system includes a ball-bearing rolling design to easily glide over smooth drywall with minimal effort.
And here’s a really cool feature on the BraveX sander, an LED light to assure all the poorly-lit surfaces are sanded to perfection.

Each BraveX electric sander includes the following –
- A pack of 12 separate drywall sandpaper disks
- Two carbon brushes
- One safety kit with goggles, earplugs, and dust mask
- One screwdriver, hex wrench, washers, and fasteners for complete assembly
- One dust extraction hose with dust bag
- One carrying bag with handles for easy storage
Buy Your BraveX Electric Sander Here!
And last but not least, BraveX is committed to your drywall sanding satisfaction –
- Free Shipping
- 90-day return policy
- Multi-year factory warranty

Where to Buy the BraveX Electric Drywall Sander
Here’s the link to the BraveX, where you can purchase the electric drywall sander.
Drywall Sandpaper Basics
Maybe it’s your very first drywall sanding job. It’s a good idea to discuss the basics to be sure your project gets off to the right start.
Sandpaper is the abrasive material for sanding drywall mud for a smooth finish. With sandpaper, you’ll want a sanding device, either a hand-sander to which you can attach pre-cut sandpaper screens or an electric sander like we discussed earlier.
Power Sanders or Hand Sanders
Power sanders, orbital sanders, and circular electric sanders are incredibly efficient and perfect for larger-scale drywalling projects.
As with many drywall jobs, but especially when sanding drywall, it’s highly recommended to have protective gear, even when sanding a small area.
Safety First
Goggles will keep drywall dust out of your eyes, while a dust mask will keep you from inhaling too much drywall dust that will inevitably fill the room.
When sanding drywall, it’s a good idea to use plastic sheeting to cover all furniture, electrical boxes, outlets, or any item that you don’t want to be covered in dust.
What is the Best Grit Sandpaper for Drywall?
120 to 150 grit sandpaper is great for sanding drywall to prepare for painted walls.
Even sandpaper as high as a 220-grit will work great for sanding dried drywall joint compound.
Sandpaper under 100-grit should be avoided on drywall mud. You may damage your fine taping job with coarse grit sandpaper, leaving streaks, lines, and divots in the taping mud.
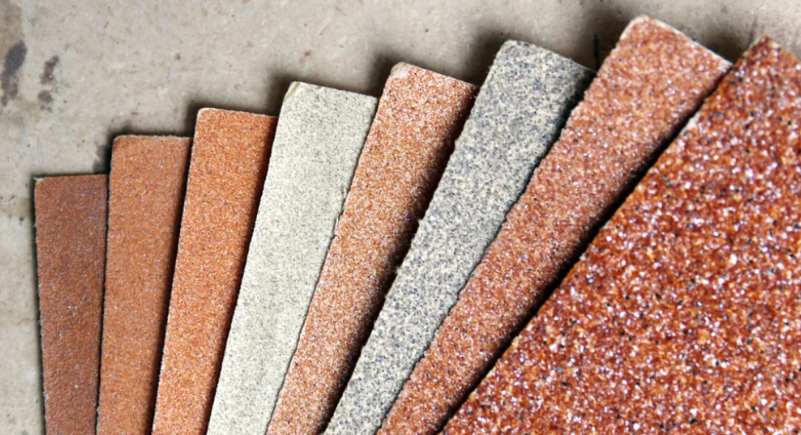
When shopping for the right sandpaper, you’re likely to run into garnet paper, silicon carbide, and aluminum oxide.
For sanding drywall, you want to choose a less coarse grit paper like garnet or aluminum oxide over silicon carbide.
Less Coarse Sandpaper for Drywall
Silicon carbide sandpaper, which is usually black, has a closed coat and a hard edge, making it ideal for sanding harder surfaces like metal or wood finishes.
Because drywall is paper-based, and modern lightweight joint compound releases so much dust, open types of sandpaper that clog much less are more ideal.
Garnet paper and aluminum oxide work well, but if you had to choose between the two, aluminum oxide might be your best choice.
The oxide paper lasts longer and is cheaper than its gemstone counterpart.
Tips for Sanding Drywall
After your drywall has been hung, your joints, seams, corners, and gaps have been taped, allow the joint compound to completely dry. Sanding is all that stands between you and painting your interiors.
With that being said, sanding is no small task and the key to a smooth finish and clean interior in any residential or commercial space.
Whether you’re patching a small hole at home or finishing the inside of a newly built office space, there are several tips and techniques that can be used for many sanding jobs.
My Top 5 Drywall Sanding Tips
- Inspect the taping and drywall before starting any sanding. Look for exposed screws, cracks, and imperfections. Fix all taping mistakes before you start sanding.
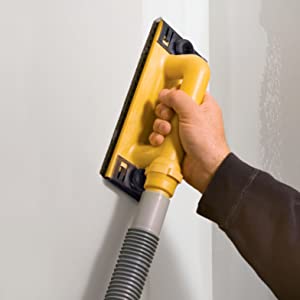
- Use a dust-free sander with a vacuum suction system to minimize dust and make clean-up simple.
- Match your sandpaper grit to the type of joint compound per the manufactures recommendations.
- Always wear eye protection and a dust mask, and ensure proper ventilation to avoid inhaling large amounts of drywall dust.
- Don’t over-sand. Start sanding lightly – you can always sand more, but if you sand too much, you’ll need to apply more drywall mud.
Wet Sanding Drywall vs. Dry Sanding
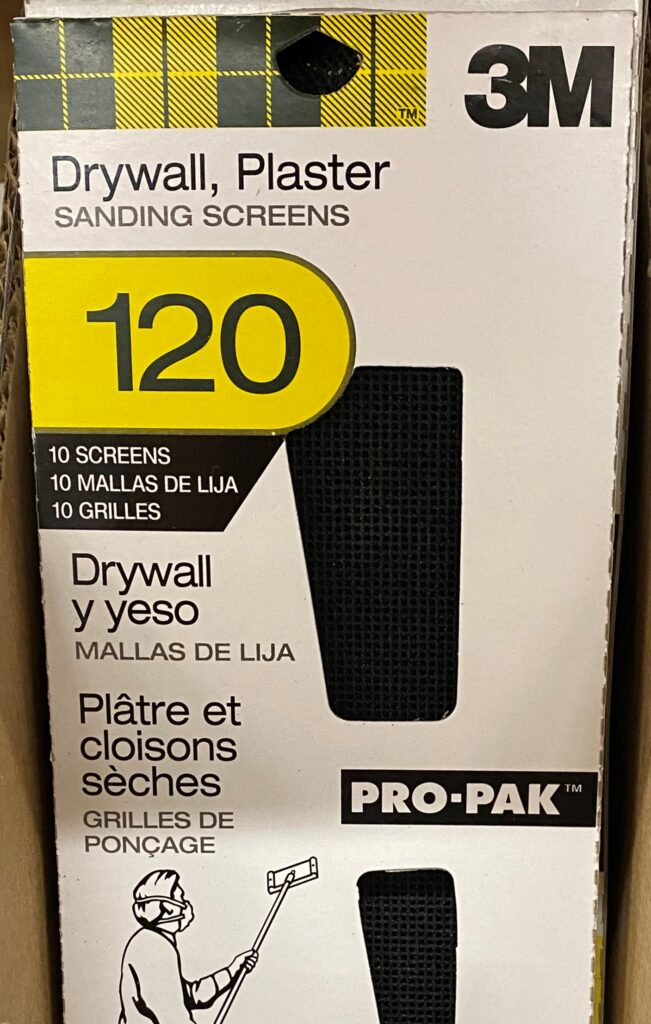
So far, we’ve only talked about dry sanding. When you’re attaching a sanding screen to a hand drywall sander or sanding pole and smoothing out your drywall, that’s defined as dry sanding.
It’s named as such because it creates a lot of dust and involves no water. The majority of your drywall should be dry sanded.
However, there are other means of sanding called wet sanding that can be done with a sanding sponge.
The Drywall Sanding Sponge
Sanding sponges can come in different grit sizes, just like sandpaper. To finish drywall, opt for a medium grit sponge.
Sanding sponges have a ton of benefits. They’re cheap and long-lasting, much longer lasting than other sandpapers. They can be used in tandem with fine sandpaper or used by themselves.
Wet sanding is ideal for sanding small patches of drywall or drywall corners. Using a hand sander in a corner is asking for trouble.
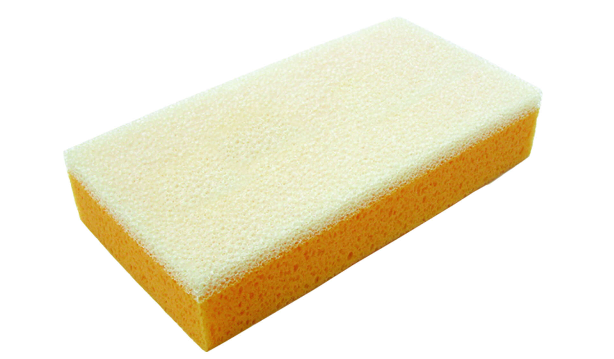
It’s hard to get a smooth edge, and when you push a hand sander into inside corners, you’re likely to gouge the other wall with the edge of the sander, leaving undesirable sanding marks.
Sanding sponges fit seamlessly into corners and are easy to use.
Wet Sanding for Small Repair Jobs
With small, circular motions, you can sand out any seam to as smooth of a finish as you could with a hand sander.
Another benefit of wet sanding is that it is significantly cleaner than dry sanding. When you dry sand a wall, it kicks up a lot of dust.
The water in the wet sanding damp sponge absorbs that dust, meaning clean-up is much less of a hassle—minimum vacuum cleaner time after the project.
Large Sanding Projects
For drywall sanding projects larger than a spot treatment or one wall, you may want to invest in some extra equipment.
An orbital power sander will make sanding multiple drywall surfaces a breeze. Many of them come with a vacuum operation that sucks up the dust as you sand, causing less mess.
We’ve already talked about my preferred electric power drywall sander, so take another look up above. For just a few hundred dollars, you can make your life easy. Other than renting a drywall lift to hang ceilings, a power drywall sander might just be the best money you ever spend! I speak from experience!
If you have high ceilings, a drywall pole sander may be necessary to reach up and extend all the way to them.
Hand Sanding Vs Power Sanding
Power sanding is great for large projects, and will save a ton of time, but proceed with caution. A power sander in the wrong hands is the fastest way to ruin a perfectly good taping job.
A power sander with an overly coarse grit or a speed set too high will cause dips, gouges, and damage to your freshly taped walls.
If you insist on using a power sander, I would highly recommend starting off on a low-power setting and being extra vigilant to not remove too much joint compound.
Gouges and Problem Areas
If you’re in the process of sanding and notice deep gouges or depressions in the gypsum board, put a light or strong lamp parallel to the wall to make spotting these problem areas easier.
Mark them down and fill them in with joint compound. Beginners often try to sand gouges or pits out. Don’t do it.
It’ll be easier to refill them with drywall mud, wait for the mud to dry, and sand those smaller areas in a circular motion.
What Type of Sandpaper Lasts the Longest?
There are six different sandpaper types to understand if you want to use the correct product for your project.
Garnet – Best for hand-sanding. Works best on wood to prep for minor scratches and dings. Small grit-size garnet particles break as sanding occurs, so it wears out fast.
Emery – Used in power sanding tools and hand sanding. Commonly used to remove paint or rust when refinishing metal. There’s also Emery cloth sandpaper for curved or delicate surfaces.
Aluminum Oxide – Commonly used on drywall, wood, metal, and plastic. Aluminum Oxide sandpaper typically lasts a long time, making it a good choice for power sanding.
Silicon Carbide – Removes material quicker than aluminum oxide but wears out faster. Common for use on drywall joints and can be used for wet sanding because of its waterproof backing. It can be used for hardened and rough drywall compound.
Zirconia Alumina – Best for metal, fiberglass, and wood surfaces. Primarily found in disc sanders and belt sanders. Longer lasting than aluminum oxide.
Ceramic Alumina – Long lasting and best for disc and belt sanders. Used for an aggressive finish that might not come off with lighter grit.
Drywall Sanding Advice – The Best Sandpaper for Drywall
It’s already been stated, but it’s worth saying again. When sanding drywall, wear protective gear, a dust mask, and goggles to avoid ingesting dust particles.
For all the DIY folks, it may even be worthwhile to wear a hat or protective headgear to keep drywall dust out of your hair. If you’ve never sanded drywall before, trust me when I say the dust will get everywhere. So try your best to minimize it.
When sanding, use medium to light pressure and sand in smooth strokes or a circular motion to create an even finish. Angle your hand sander slightly to avoid over sanding one area. If you’re using an electric sander, start with the power on the lowest setting, then increase speed as needed.
Prep, Cover, and Protect for Drywall Sanding Dust
Cover outlets, doorways, and windows to stop the dust from spreading into other areas of your home improvement project.
Sanding screens are more durable and allow dust to pass through them, meaning you’ll be kicking less dust into the air that you’ll have to clean later on.
Don’t Rush, Take Your Time!
For the best-looking painted drywall walls and ceilings, sanding methods should be followed, step by step. Don’t rush. I can tell you it’s nearly impossible to “quickly” sand drywall. It takes time. Don’t get in a hurry. This is the process that will set you up for great looking painted walls and ceilings. You’re almost there!
If possible, use a sanding block with a sanding screen over regular sandpaper. Just like the drywall knife, saw, drill, and taping hawk, there’s always new and improved products hitting the market. Keep an eye out for new time-saving tools and techniques. Your back will thank you in the morning!
Additional Resources –
Current Pricing for Drywall Sanding Supplies – Home Depot
Current Pricing for Drywall Sanding Supplies – Amazon
Current Pricing for Drywall Sanding Supplies – Lowes
A Comprehensive Guide to Finishing Gypsum Board Surfaces – TSIB.org


