What is a level 5 drywall finish? Most people in the construction industry know that there are 6 levels of drywall finish, ranked from 0 to 5. But do you really understand the details of each drywall finish level?
Let’s start by explaining the level of drywall finish refers to the quality of the wall surface that will receive paint or other decorative coatings.
Where level 0 drywall finish is simply just exposed drywall, and level 5 is the most stringent and demanding type of drywall finish.
If you’re involved in construction of any kind, you need to know your drywall finish levels.
Let’s dive into each level of finish, then, specifically look at level five drywall finish. What it is, where it’s used, and how to apply it.
What are the 6 Levels of Drywall Finish?
The drywall construction, painting, and manufacturing trade associations recognize 6 finish levels of drywall surfaces for interior walls and ceilings.
This ranking system was developed by the Gypsum Association in 1991 to standardize how walls are assembled and sealed during the building process.
These guidelines define in detail the exact level of finish. To fully comprehend how you arrive at a Level 5 finish, it helps to understand each level before it.
Level 0
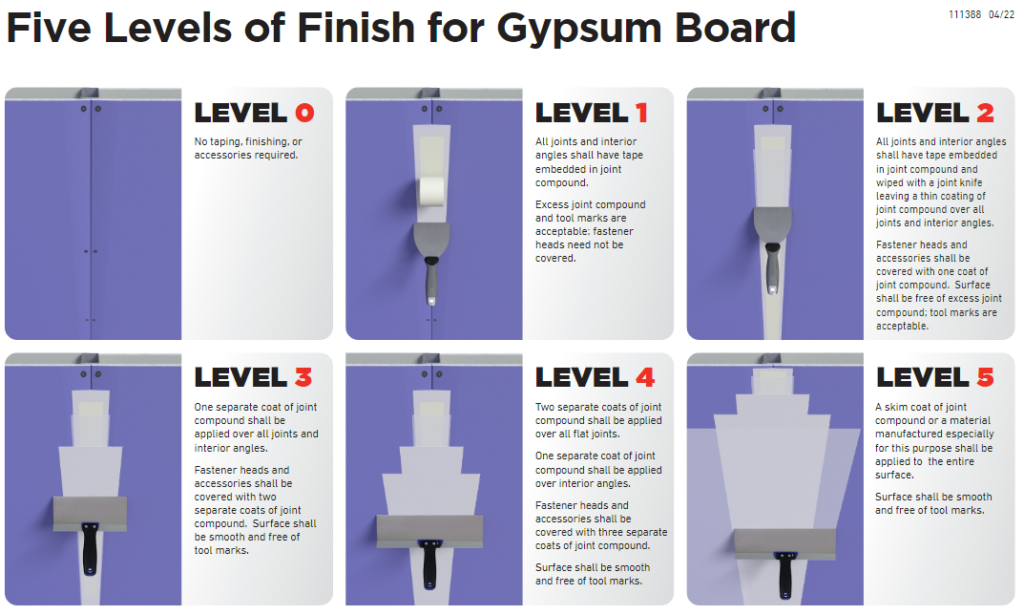
Level 0 finish means the drywall has been attached to the walls and ceilings but has no paper tape, mesh, or joint compound finish applied to it.
Level 0 is most commonly referenced in spaces where interior design has not been completed.
Contractors might also refer to Level 0 for temporary construction wall barricades, dust partitions, and other similar structures where drywall is needed for only a short time.
Level 1 Drywall Finish
Level 1 refers to the most basic level of finish. Drywall tape is applied to the seams and butt joints, but nothing further has been coated with mud.
Level 1 finish is typically used in places not visible or accessible such as crawl spaces, and concealed areas.
Other common applications for level one drywall finish is above ceilings, service corridors, attics, crawl spaces, or a plenum area. It also could be required behind insulated metal panels in some cases.
Level 1 finish is also referred to as fire tape, which is the minimum amount of taping required to achieve fire ratings on partitions.
When space is unfinished but still requires fire, sound, or rated partitions, fire taping with a level 1 finish is needed.
Level 2 Drywall Finish
Level 2 is also an unfinished state where the wall is not likely to be painted and not visible to public or living areas.
Joint tape is embedded in the compound. Tool marks and ridges are allowed. Corner bead and drywall nails or screw heads are coated and excess mud is wiped away.
Level 2 is commonly used in garages, warehouses, and other storage areas, or walls to receive tile.
Level 3 Drywall Finish
Level 3 finish includes a coat of joint compound over the drywall tape.
Level three finish requires drywall screw fastener heads and corner beads to receive two coats, whereas a level 2 finish includes only one coat.
The finish must be smooth, and free from tool marks or ridges.
This level is used with a medium to heavy wall finish like skip trowel, knockdown, orange peel, or popcorn ceiling texture.
A level 3 finish can sometimes be used for heavy-grade wall coverings. But don’t make this decision on your own, always check manufacturer recommendations for any finish behind wall covering.
Level 4 Drywall Finish
Level 4 finish for drywall is the most common for walls and ceilings receiving light texture, semi-gloss, and flat paint.
Another coat of drywall mud covers the tape at the joints. The fastener screw heads and corner bead are covered with three coats.
The joint compound is sanded down smooth so no tool marks, lines, dimples, or ridges are visible.
Level 4 might also be used for lightly-textured painted surfaces and lightweight wall coverings.
Enamel paints, semi-gloss, and high gloss paints are not used over a level four drywall finish.
Now your drywall is ready for a level 5 drywall finish. The ultimate finish for ultra-smooth, high-end, blemish-free walls, and ceilings.
Let’s keep going!
What is a Level 5 Drywall Finish?
Level 5 is the most complicated level of drywall finish. It’s a premium finish requiring the highest degree of skill to apply.
What is the difference between a level 4 and level 5 drywall finish? It includes all the steps of Level 4, but with an additional thin skim coat of joint compound applied evenly across the entire wall, ceiling, or surface of the gypsum board.
The skim coat creates a uniform finish and a perfectly smooth surface.
Level 4 Vs Level 5 Drywall Finish
You don’t often hear references to Levels 0 thru 4 on a job site, whereas level 5 is often used as a buzzword for the highest quality smooth wall finish.
The labor-intensive process of applying a level five finish catches the ear of everyone involved in a project. If you want level 5, you are talking about space that requires perfection.
A level four finish is a typical embed, coat, and sand process. Level five finish goes one step beyond level four, and adds a skim coat of joint compound over the entire surface. It’s a perfectly finished surface.
How many coats are in a level 5 drywall finish? There are three coats of joint compound, then a skim coat creating the smooth level 5 finish.
Level 5 Drywall Finishing
The end result is drywall with a smooth, uniform surface that looks great under any conditions, such as severe lighting conditions, shadows, or high gloss paint.
There is also no chance of fasteners and screw heads showing through the paint. The finished level 5 surface will be ready for wall coverings, paint, or final decoration.
Another way of looking at a Level 5 drywall finish is a skim coat of drywall mud, or joint compound, completely covering a typical Level 4 finish.
When is Level 5 Drywall Used?
A Level 5 finish is the gold standard. However, different areas and rooms require different levels of finishing.
Any wall that is hidden from view, such as behind a kitchen cabinet in a residence, or in a storage area in a commercial building, does not require level 5.
It would be a waste of time, money, and energy to apply a level-five finish to any surface that will be hidden from view.
A Level 5 Drywall Finish is Typically Used in Two Settings:
1. When the final coat is glossy, or when non-flat paints are used.
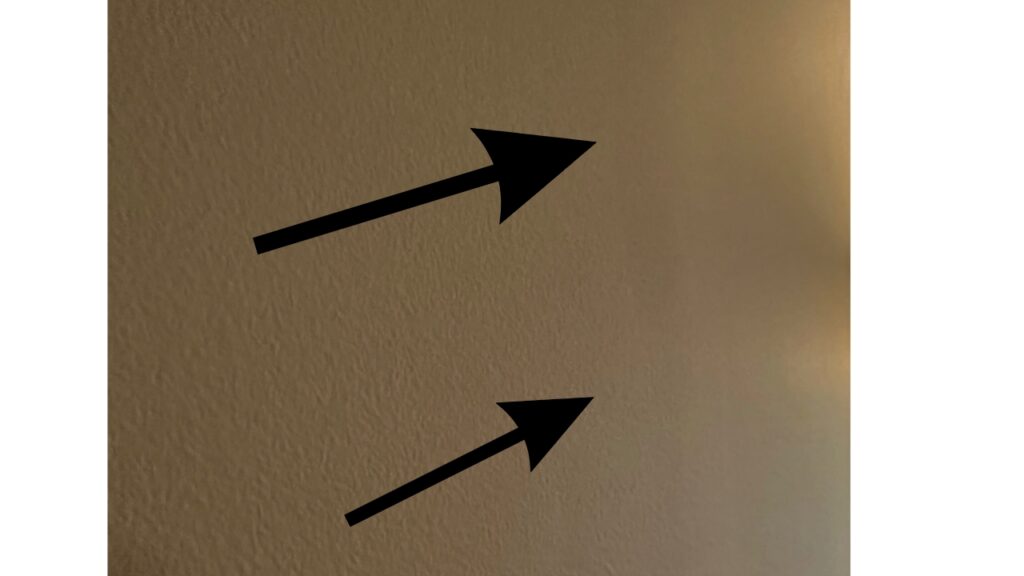
2. When walls, ceilings, and surfaces are in critical lighting or similar areas. Light coming from fixtures or large windows angled low enough to show irregularities, such as bumps and depressions, and must be skim-coated.
The ceiling is a good example of an area where a Level 5 finish may be required. This is because ceilings can be raked by natural light streaming in through the windows, highlighting flaws in the finish.
How is Level 5 Drywall Applied to Walls?
You’ve decided on a level 5 finish, great. Now you have one last decision. How to apply it.
You have three choices –
- Roll the taping mud on the wall with a thick nap roller, then wipe off the excess mud with a taping knife.
- Apply the skim coat by hand with a taping knife and a pan full of mud. This is my least-favorite option, for what it’s worth. Unless it’s a very small area.
- Spray drywall compound mud on the wall and ceiling with a sprayer.
Let’s get into the details of each of the three options.
1. Roll On Level 5 With a Paint Roller
Even for small level-five jobs, a paint roller makes perfect sense for a quality job.
Be sure to use a thick-nap roller and drywall joint compound mixed to the correct mixture. After rolling on the taping mud, wipe off with a knife into the pan.
On large projects, taping professionals often use 24 inch or 48 inch skimming blades for time-saving production increases.
2. Skim Coat by Hand With a Taping Knife
This “old-school” skimming method using a taping pan and knife was most common before high-tech sprayers were invented.
Now, with amazing ‘high-build’ products and affordable sprayers, you’d be crazy to apply a level five by hand.
Applying a level five skim-coat by hand is the most labor-intensive choice, but makes sense if the area is small. For any larger area, rolling or spraying will save you a ton of time.
When using a taping knife, apply joint compound to the wall, and smooth it over with the knife. Repeat process to infinity. Sand lightly when complete.
3. Spray On Level 5 With High-Build Primer
It seems every year there’s a new sprayer invented. The affordability of small convenient sprayers makes this option more and more appealing.
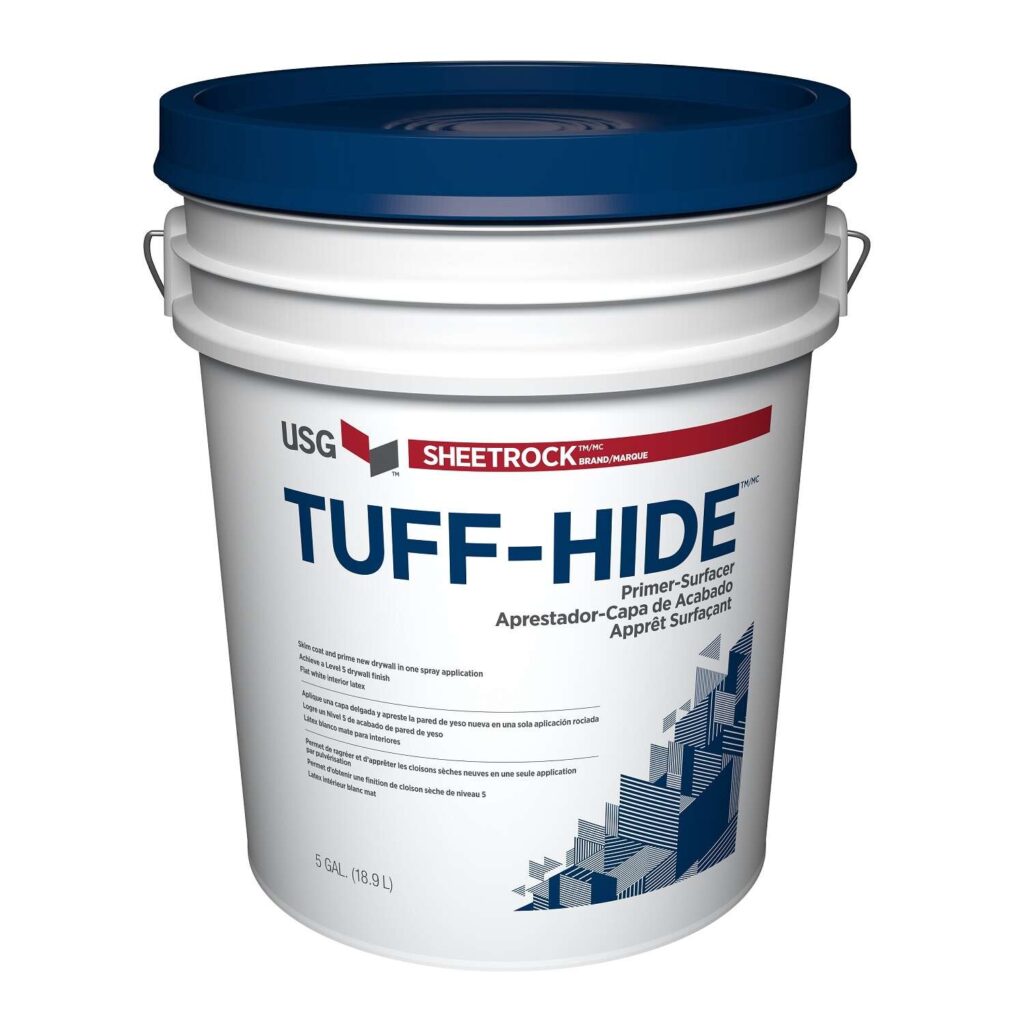
Level 5 products like the ‘Tuff-Hide’ USG level five compound mix make spraying a no-brainer for large projects.
One light coating of Tuff-Hide with a sprayer, then a gentle sanding is the recommended method for a great level 5 finish, in my humble opinion.
Some high-build primer products are moisture and mold resistant, adding to the benefits of a great-looking, smooth level 5 finish.
Whether you are a commercial drywall contractor, residential contractor, small business owner, or do-it-yourselfer, it always helps to have a few extra tips about getting the smoothest possible level 5 drywall finish with skim coating.
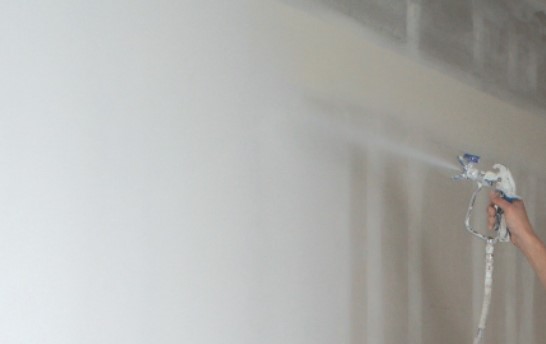
Professionals often use special spray equipment that can also be purchased through drywall supply yards or rented at home improvement stores.
Here is our recommendation for using a roller, which is an effective method for the DIY crowd, and anyone lacking professional drywall taping experience.
Rolling On Level 5 Finish
Initial Sanding
First, sand the wall surface with a pole sander.
This assumes you have completed the previous finishing process to a level 4 standard.
All joints and interior angles should include tape with joint compound and a consistent, thin drywall mud coating.
Dust Removal
Using a brush, remove all the dust, drywall mud, and chunks of joint compound from the surface.
Mix the Mud, Prepare the Compound
Mix the drywall joint compound with water until you get a consistency that is not too thin. To test the consistency of the mixture, dip a roller with a thick nap into the solution.
It should cling to your roller, not drip off it. You can also purchase pre-mixed drywall primer, which is ready to spray or roll onto surfaces straight from the bucket, often referred to as high-build primers.
Apply the Compound
Roll the compound over the entire surface of the wall. You should move your roller up the wall rather than down to prevent drips. Use a single long pass, and go over the seams to blend them in.
The compound should be applied in a heavy coat – if it’s too thin, it will dry too quickly, preventing you from removing it.
Remove the Compound
After rolling an area with a width of 4 feet, remove the compound right away with a finishing knife. Apply compound that is still wet to any area that has dried to make it easier to remove.
Remember, a Level 5 finish is a thin film, not a veneer plaster finish. Your goal is to even out the entire surface as a priming coat, not to trowel a thick layer onto the wall.
Final Sanding
After the wall has completely dried, which might take an hour or two, go over it with your pole sander using 220-grit sandpaper until you have a uniform surface.
Estimating Level 5 Drywall Cost
You might be wondering how much more a level 5 finish costs than a level 4. Because it’s a premium finish, there’s also a premium price to pay.
A level 5 finish can cost $2.00 to $4.00 per square foot, depending on the labor rate.
It’s a highly labor-intensive process, and materials are only a small percentage of the overall price.
Is a Level 5 Finish Worth the Price?
You might be asking yourself if a level 5 drywall finish is worth it.
Once you compare the final results between a level 4 and a quality level 5 skim coat finish, you will be glad you went the extra mile.
There’s no comparison between a level 4 and the smooth finish of a level 5.
Now that you have a grasp on high-quality Level 5 drywall finishing, go out and take your work to the next level!
Additional Resources –
Tuff-Hide Level 5 Solutions Brief – USG Sheetrock
Recommended Levels of Finish – Wall and Ceiling Bureau
Current Pricing on Level 5 Drywall Tools – The Home Depot


