A sheetrock lift can make a seemingly difficult drywall project simple. The ease of use, durability, and safety features of a sheetrock lift make it one of the most valuable tools you can have on a construction job.
Take your sheetrock hanging to the next level. Tape, mud, texture, and hit every joint and screw knowing you saved strain and stress. Get yourself a sheetrock lift, and thank me later!
What is a Sheetrock Lift?
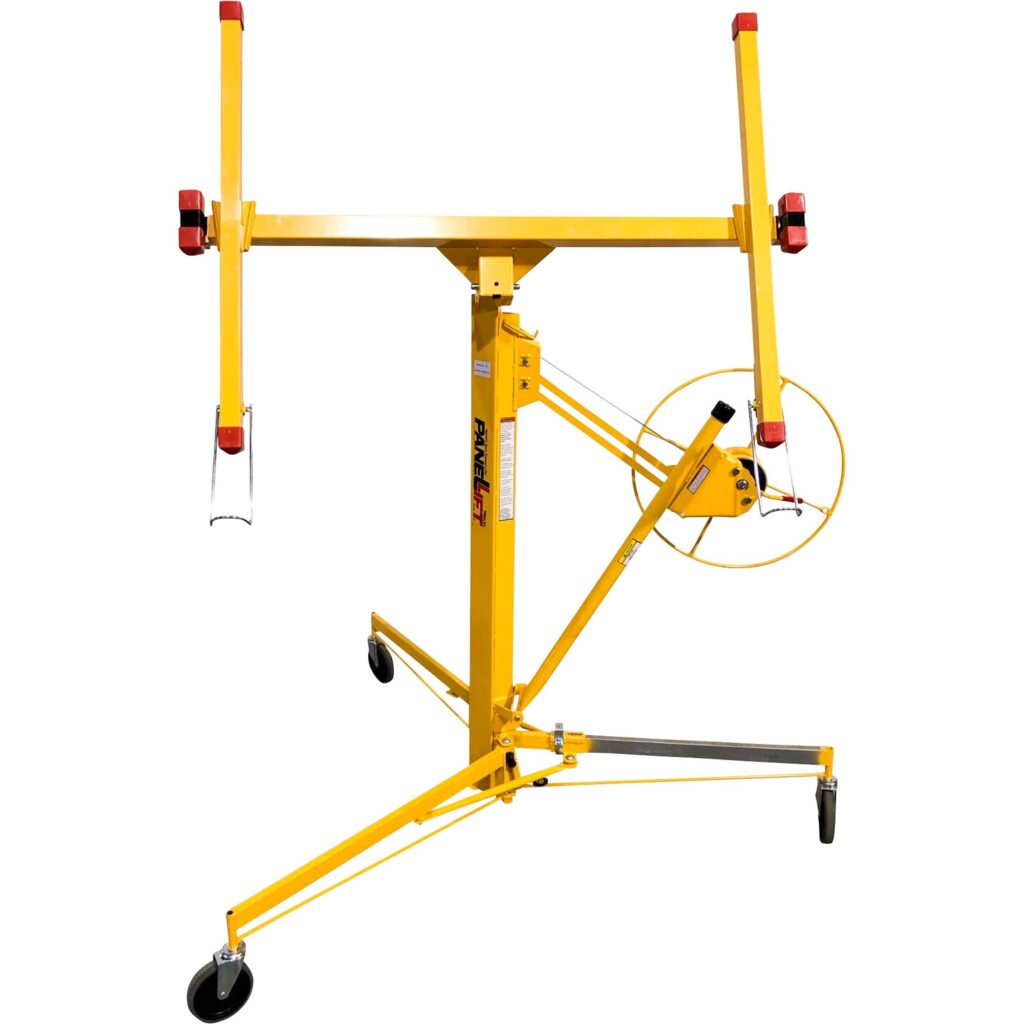
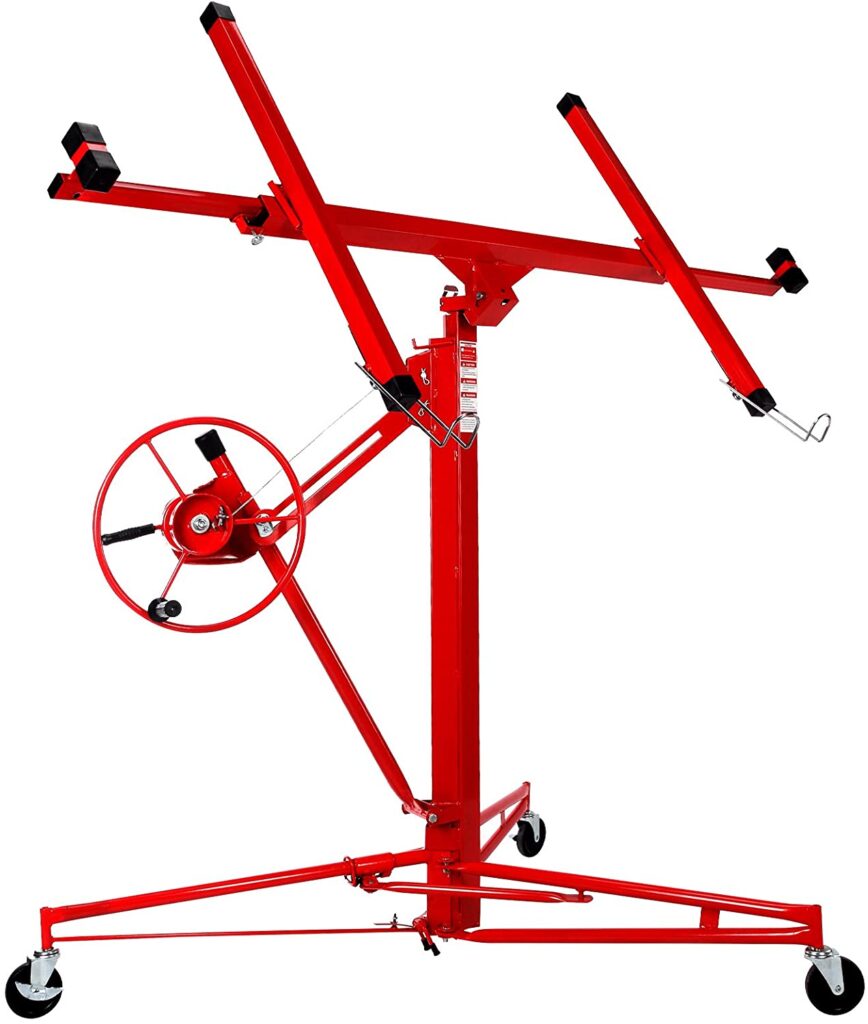
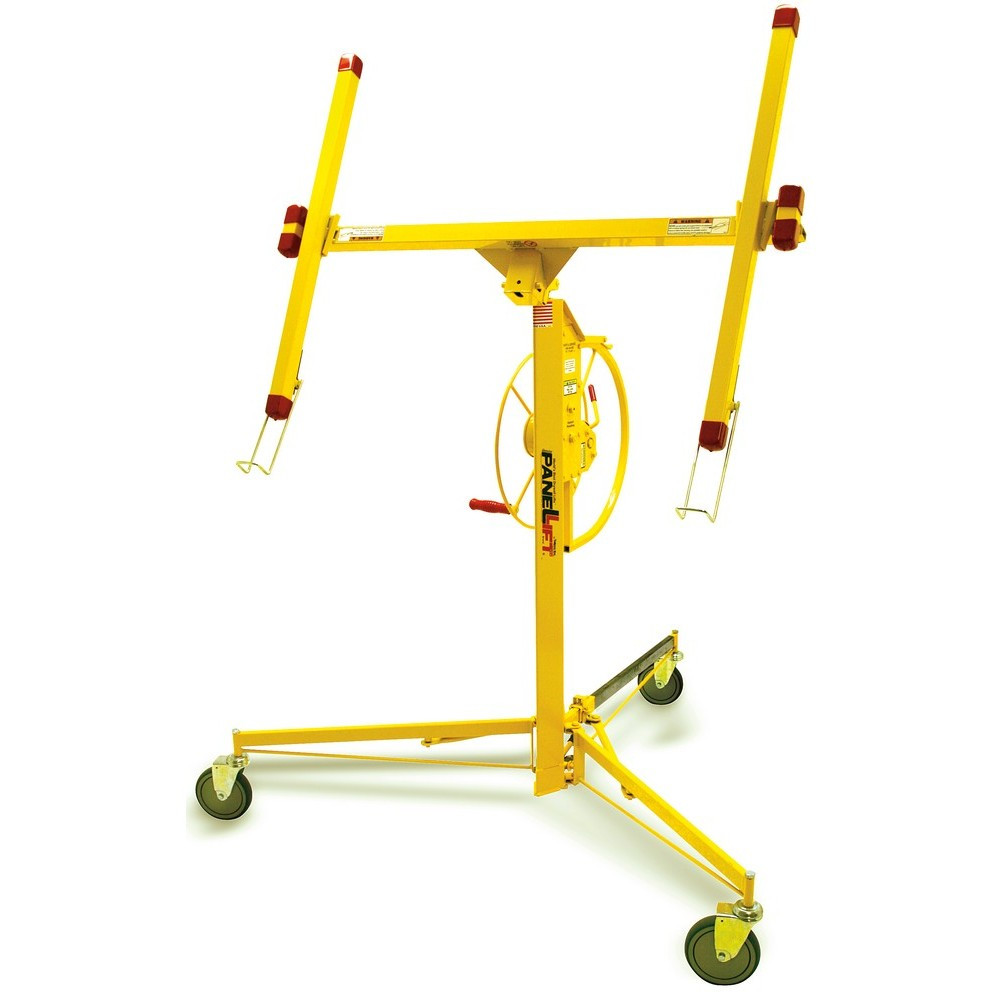
A sheetrock lift, also known as a drywall lift, drywall hoist, or sheetrock jack, is a piece of equipment designed to lift and hold sheets of drywall into place on walls or ceilings.
Drywall lifts are relatively inexpensive and save plenty of time and energy on DIY projects. They are also commonly used in larger residential and commercial projects.
Benefits of Using a Sheetrock Lift
A drywall lift can be a serious lifesaver. Drywall panels are notoriously heavy and unwieldy given their large sizes.
Drywalling jobs can easily require 2 to 3 people for material handling, especially if those jobs involve hanging a sheet of drywall on a high wall or ceiling.
Where you’d typically need multiple people on ladders, wobbling and trying to hold drywall panels flush against high walls, a quality drywall hoist turns the entire ordeal into a safe, fast, and one-person job.
Given the reasonable price, increased ease, better productivity, and safety of a drywall lift, it’s hard to see any downsides to using one.
Along with drywall stilts, a sheetrock lift might be the best investment you will ever make.
How a Sheetrock Lift Works
Sheetrock lifts are separated into a combination of three parts: a base, a mast, and a cradle.
The Base
Typically in the shape of a tripod and has caster wheels that allow for easy movement of heavy drywall panels.
The Mast
Connects the wide tripod base, the support system of the lift. The mast also includes a single-stage winch used to hoist the drywall.
The mast ratchets, extending and contracting, allow for drywall panels to be lifted to high walls and ceilings and returned to a lower position to be easily loaded.
The Cradle
Attached to the mast which holds drywall or other types of paneling in place.
These three parts usually include tool-free assembly and can fit inside a car or truck.
Another drywall lift option you might find helpful is the loader attachment. With a loader, you can reduce the drywall loading height to only 4” by adding the cable-driven hand-cranked winch.
How to Use a Drywall Lift
After assembling the base, mast, and cradle, using a drywall lift is relatively simple and can be explained in a few steps.
- Clear the floor around the area you’re working in. Roll the drywall hoist into the correct position. Ensure access to the cradle, and angle the cradle slightly so you can load the panels of drywall.
- Lift the drywall panel onto the hooks at the bottom of the cradle. If by yourself, lift and set one side of the panel at a time. Ensure the front of the panel is facing the lift. Be sure the casters are in a locked position for stability.
- Rotate the cradle on the hoist to the angle of the wall or ceiling that you’re drywalling. Lift the sheet by turning the crank. Once you’ve positioned the drywall panel in place, crank the sheet tightly against the studs or joists.
- Screw the drywall panels in. If you’re working on high walls or a ceiling, use a step ladder and prioritize the safe installation of the screws. A typical drywall panel requires at minimum eight screws to secure the sheet. Once you’ve gotten this amount or more, you can back the drywall lift away and finish fastening the drywall in place.
Drywall Lift Pre-Planning Considerations
When loading the drywall panels onto your lifting board of choice, it’s important to consider whether to load them in a vertical or horizontal position.
Some commercial buildings have fire codes that demand vertical laying. But for most residential projects or buildings built with a wood structure, laying drywall panels in a horizontal position is more appropriate.
With wood construction work, the horizontal position provides fewer seams, easier finishing, and helps to hide uneven or bowing studs.
Renting vs. Buying a Sheetrock Lift
When committing to any project, money is one of the most important factors.
In the instance of drywall, you may be asking yourself whether it’s smarter to hire a sheetrock installer, rent a sheetrock jack, or simply buy it yourself.
While hiring a sheetrock installer saves you time and energy, the cost of having someone else drywall a room can quickly add up to thousands of dollars.
Do-It-Yourself Drywall Lift Rental
Renting a drywall hoist at an in-store retailer and doing it yourself provides the satisfaction of your own construction project.
But there is the inconvenience of having to pick up and drop off your sheetrock jack.
Some retailers might deliver rental equipment to your project.
Whether it’s a boom lift, an air compressor, or smaller construction tools, rental delivery is always a great option.
It’s no doubt that renting a drywall and panel hoist could be the best investment you’ve ever made.
The Sheetrock Lift = The Best Money You Will Ever Spend
In recent years, the prices of drywall lifts have dropped to the point where you can find high-quality drywall hoists for just a couple of hundred dollars.
Sheetrock lifts are durable, easy to store, and last a long time, so if you hang drywall on a regular basis, owning your own drywall lift panel hoist might make sense.
All of the above are viable options for your next construction project but for DIY-ers and penny pinchers alike.
If hanging drywall is something you might do with regularity, it’s hard to beat the worry-free nature of owning a quality drywall lifter!
The Best Drywall Lifts
If you’ve gotten this far and still aren’t convinced that a quality drywall lift is among the best DIY purchases you can make, there’s not much to be done for you.
But, if you recognize that a drywall hoist is a must-have for any drywalling project, you’re likely wondering, “What is the best drywall and sheetrock lift to use?”
The answer depends on what type of job you’re looking to do.
If you’re not currently working in construction, it’s unlikely that you’d need a contractor-grade drywall material lift that can run over $1000 each.

If you’re only doing work on walls, an economical option is to find some drywall hand support poles.
The downside is, they only work on walls and require more than one person to secure each pole and panel in place.
Things to Consider
The most important things to look for when trying to determine the best drywall lift to acquire are:
- Its size (so as to figure out where to store it and how to transport it to a building site)
- Its weight and load capacity
- The lift height, or how high the lift will extend
For most residential, at-home, or DIY purposes, an 11-foot sheetrock lift with 150 pounds of loading capacity is the most common.
Even a standard drywall panel lift hoist will save you hours of sweat and muscle soreness in your arms, neck, and upper body.

Learn Sheetrock Lift Features
However, it’s still important to find a drywall lift that suits the specific needs of your build.
If you’re working on ceilings, it’s important to look for certain features that aid in that process. Most sheetrock lifts include an adjustable telescopic arm.
For ceiling work, look for drywall hoists with strong steel construction, a tripod base, and anti-slip feet or locking wheels.
Sheetrock Lift Safety
These features ensure the lift will stay locked in place while bearing a load of a drywall panel at full extension.
As with most applications of drywall lifts, these features provide both convenience and safety for securing panels in place.
Sheetrock Lift Durability
In general, the best drywall lifts are constructed with a heavy-duty steel frame that’s fully welded together.
This type of construction ensures both a secure drywalling experience but also a more durable product, increasing longevity and giving you more bang for your buck.
An additional feature is a winch brake that will lock the drywall hoist in place and prevent accidents.

Cost of Drywall Lifts
Now that you know what to look for when purchasing a drywall lift, the biggest factor is price.
Fortunately, these features, from the support hook to the winch brake down to the load-bearing quality can be found in sheetrock jacks and drywall hoists as low as $200.
Most at-home or DIY project drywall lifts can be found in the $200 to $500 dollar range. These models include the majority of the features from above and are easily collapsible for convenient movement and storage.
If you’re looking for heavy-duty sheetrock jacks with large weight capacity, the pricing can get higher. Contractor-grade, construction-quality jacks can get as expensive as $3500.
Higher-end drywall lifts include battery power and hydraulics, along with much more weight-bearing capacity.
Tips for Buying Sheetrock Lifts
Be sure to do your proper research before buying or renting your next drywall lift.
While a drywall lift is less expensive than hiring a sheetrock installer for a few days to drywall a room, at around $200, a drywall lift is no cheap purchase.
Look at reviews of the hoists you’re interested in. Visit a local store and talk with sales representatives.
Best Drywall Lifts
Telpro 439 14’ Panellift drywall lift – The Telpro panel lifter is a commercial-grade bestseller featuring a 200-pound weight capacity and a heavy-duty chain drive system. The 14 ft drywall lift is backed by a 3 year warranty.
Panellift HangPro 150 – The Panellift HangPro drywall lift is made specifically to hang drywall on vertical walls. It’s a perfect installation tool for small jobs where walls are 10 feet tall or less.
The Panellift HangPro 150 has a max load rating of 150 pounds and a capacity for sheets up to 4’ x 16’.
Vevor Drywall Hoist Jack Lifter – The Vevor steel drywall panel hoist jack has a 150-pound load capacity with a telescopic arm reaching 16 feet high.
The Vevor drywall roll lifter can tilt 60 degrees forward or backward and rotates 360 degrees. The panel carrier is a lockable tool with three anti-slip casters for stability.
Make Your Life Easy with a Sheetrock Lift
In the building business, there’s a reason why drywall is the industry standard for transforming a stud and joist-filled frame into a room ready for finishing.
The construction material is efficient, affordable, and easy to use.
However, it is heavy. Hanging drywall is sometimes referred to as hanging rock for this very reason: drywall is a pain to lift.
Save Your Back, Arms, and Knees with a Drywall Hoist
Each square foot of half-inch drywall weighs around 1.6 pounds.
Thicker drywall weighs even more. With drywall commonly sold in 8, 10, 12, and 16-foot sheets, sheetrock panels can weigh anywhere from 50 to over 110 lbs. each.
The Greatest Invention Ever?
Because drywall is so heavy and difficult to maneuver, and because you also must hold it in place while securing it with drywall screws, a sheetrock lift is darn near a must-buy item.
Sore muscles, neck pain, and unsafe job sites are a thing of the past with a sheetrock lift.
A Few More Sheetrock Lift Tips and Tricks
- Hoist the sheet of drywall slowly, any abrupt movements could tip the sheetrock off the lift hook.
- Turn the drywall horizontally when moving the lift into position. Once you raise the drywall closer to the ceiling, you can maneuver the lift in small amounts so the sheet fits perfectly.
- Take care to assemble and disassemble the sheetrock hoist. Fingers can be easily pinched by the folding arms and supports. I know this by experience, unfortunately!
- Always check the lift cable before each use. You won’t want to use a lift with a faulty cable.
- Double-check the ceiling area for anything hanging – there’s nothing worse than having to crank down a sheet after noticing a light fixture hanging in your way!
- Double-check the lift break drum before each use. Be sure it’s clean and ready for action!
Who Invented the Drywall Lift?
And last, but not least, the most important question of the day. Who invented this amazing piece of equipment?
It turns out, Roland Young invented the sheetrock lift in the early 1970s. After spending all night wondering how drywall hanging could be improved, without as much struggle, Roland drew up the early plans for the drywall lift.
But he didn’t just stare at a sketch, he actually grabbed a few pieces of metal and almost instantly began welding together the very first prototype of the sheetrock lift.
Beginning Telpro Inc.
When every worker who used Roland’s invention begged him to borrow it, he knew he has something valuable.
Roland Young started Telpro, Inc. As president, Roland’s invention underwent several re-designs. And many other versions of the sheetrock lift were designed by other companies. All from Roland Young’s earliest model.
Roland Young, wherever you are – thank you! Your invention has saved hard workers many millions of pounds worth of drywall lifting. So that energy can be spend elsewhere. Thank you Roland!


